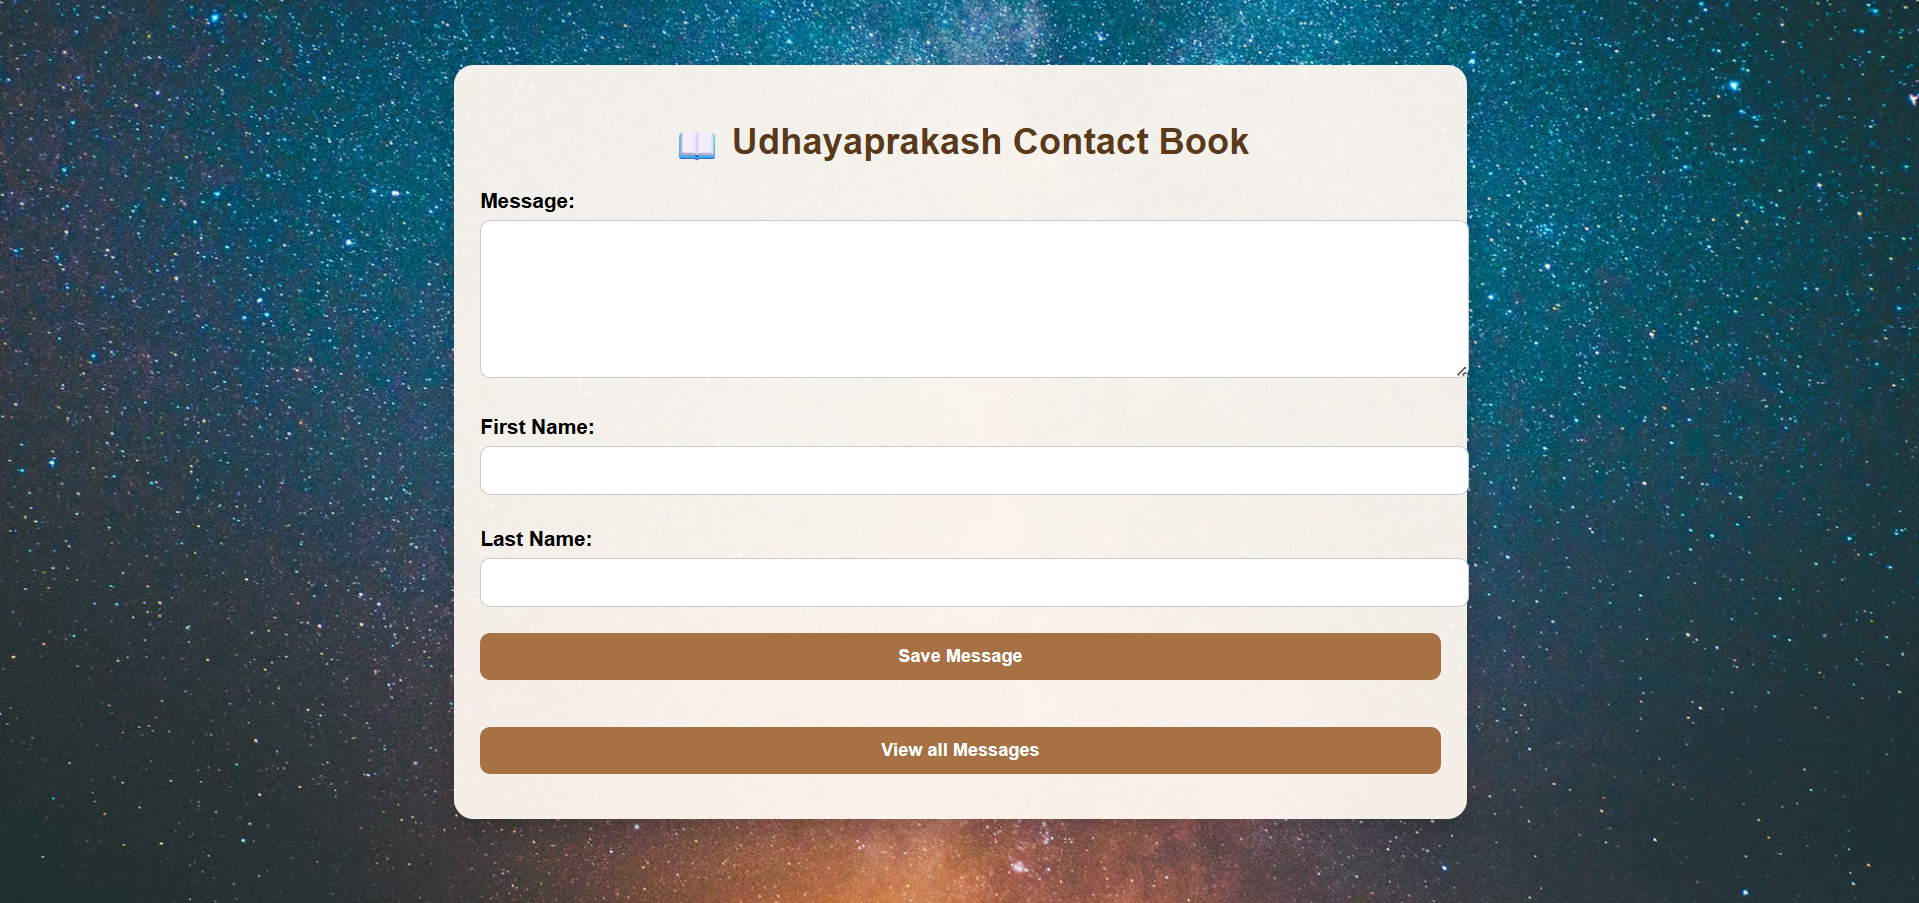
Step-by-Step with Screenshots
Step 1: Design the Contact Form
- Create an HTML page with a form containing fields for name, email, and message and include "Save" and "View Messages" controls.
- Add JavaScript that sends a POST request to save contact details and a GET request to retrieve messages.
- Place a screenshot or wireframe showing the form and UI interaction.
- Include Name, Email, and Message fields.
- Use Bootstrap for responsive design.
- Add form validation and accessibility labels.
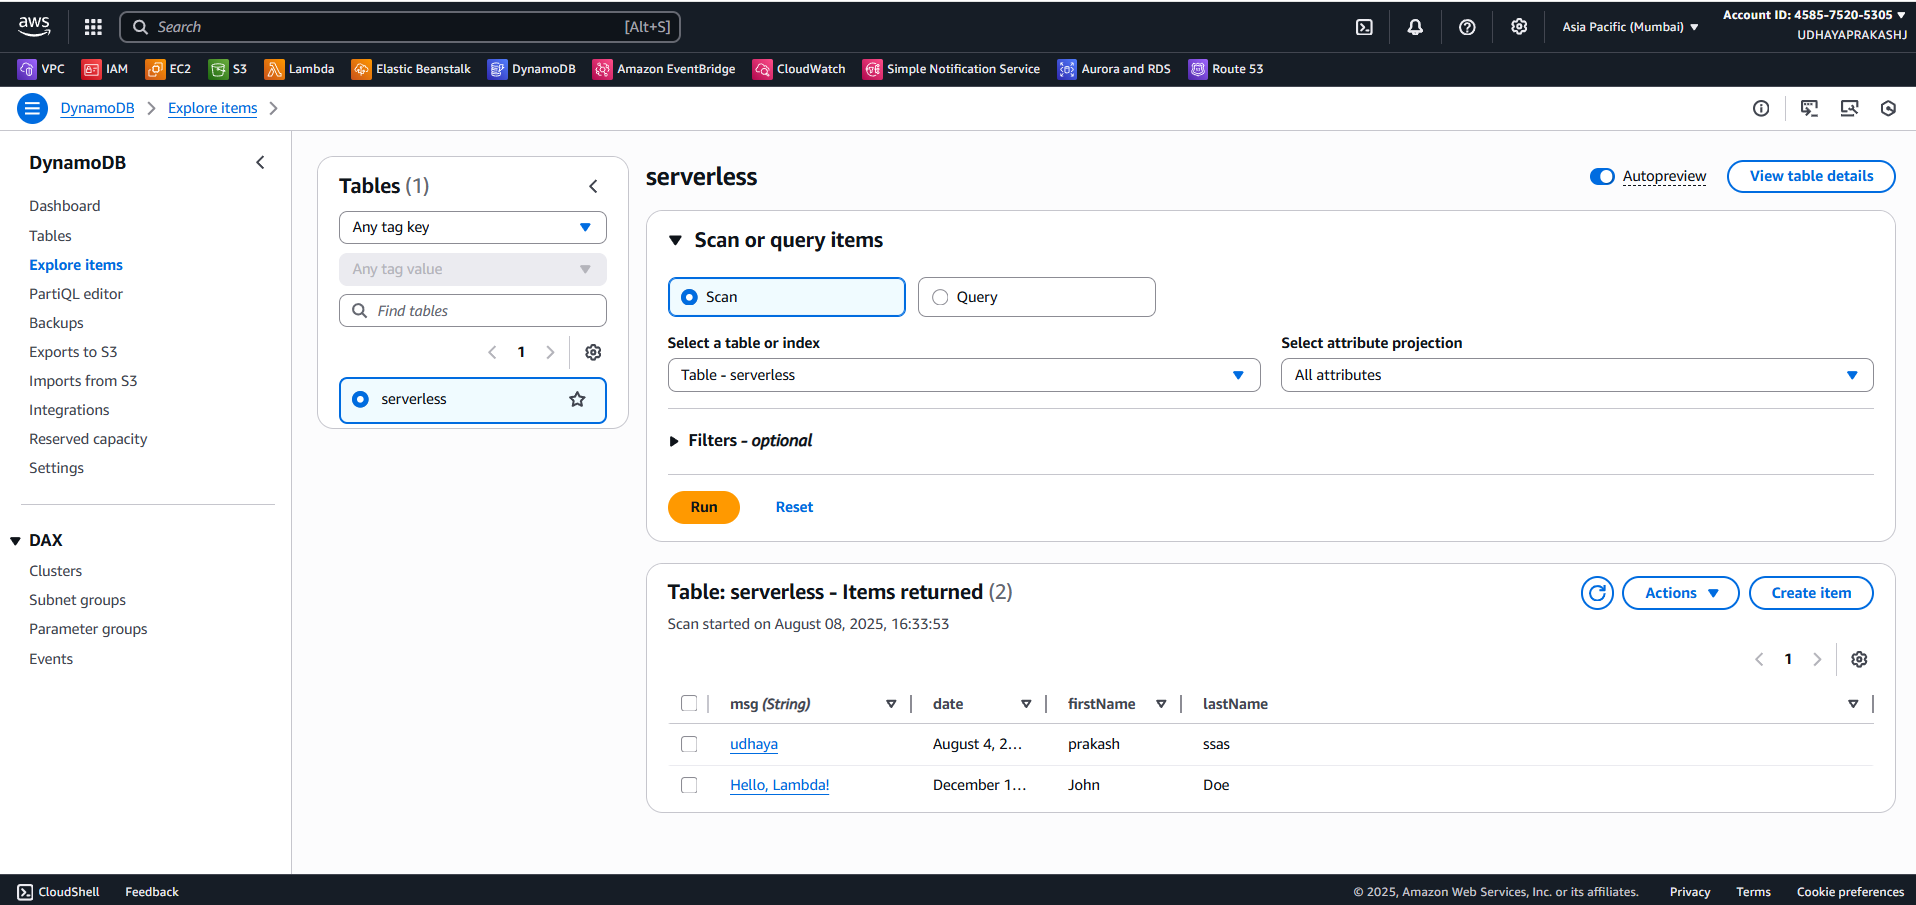
Step 2: Create DynamoDB Table
- Open the AWS Console → DynamoDB → Create table.
- Table name: Serverless
- Primary key: msg (String).
- Use on-demand capacity mode for simplicity.
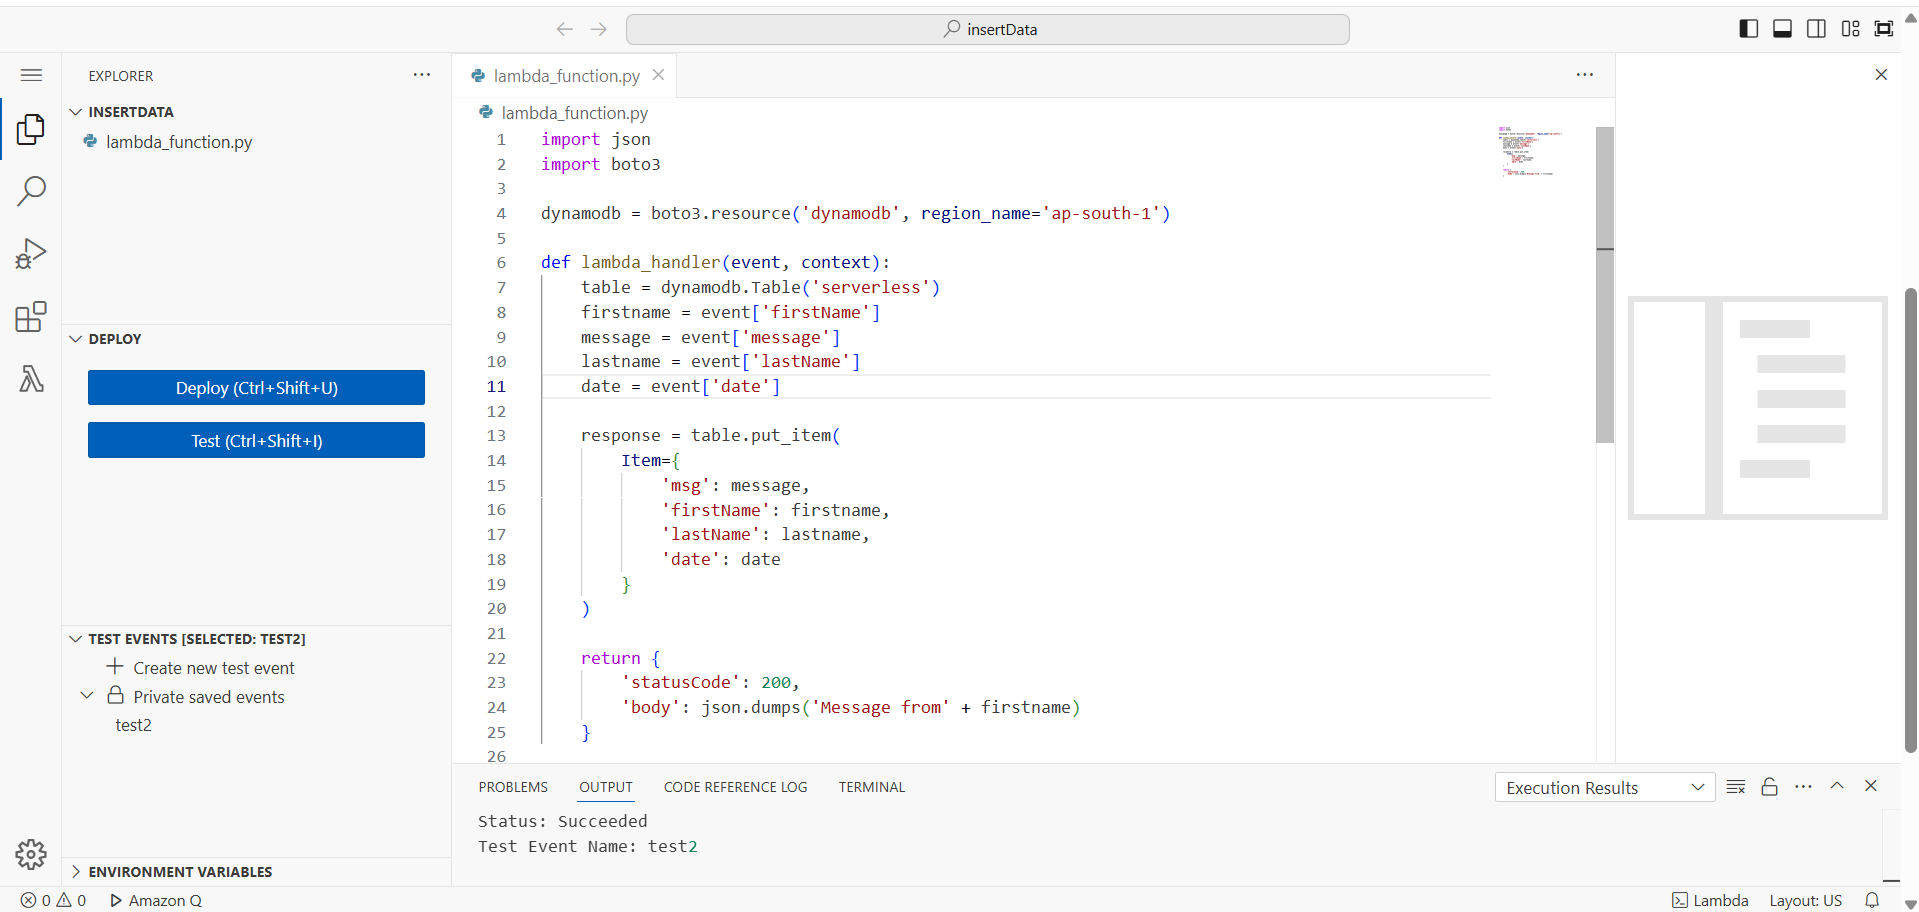
Step 3: Write Lambda Function
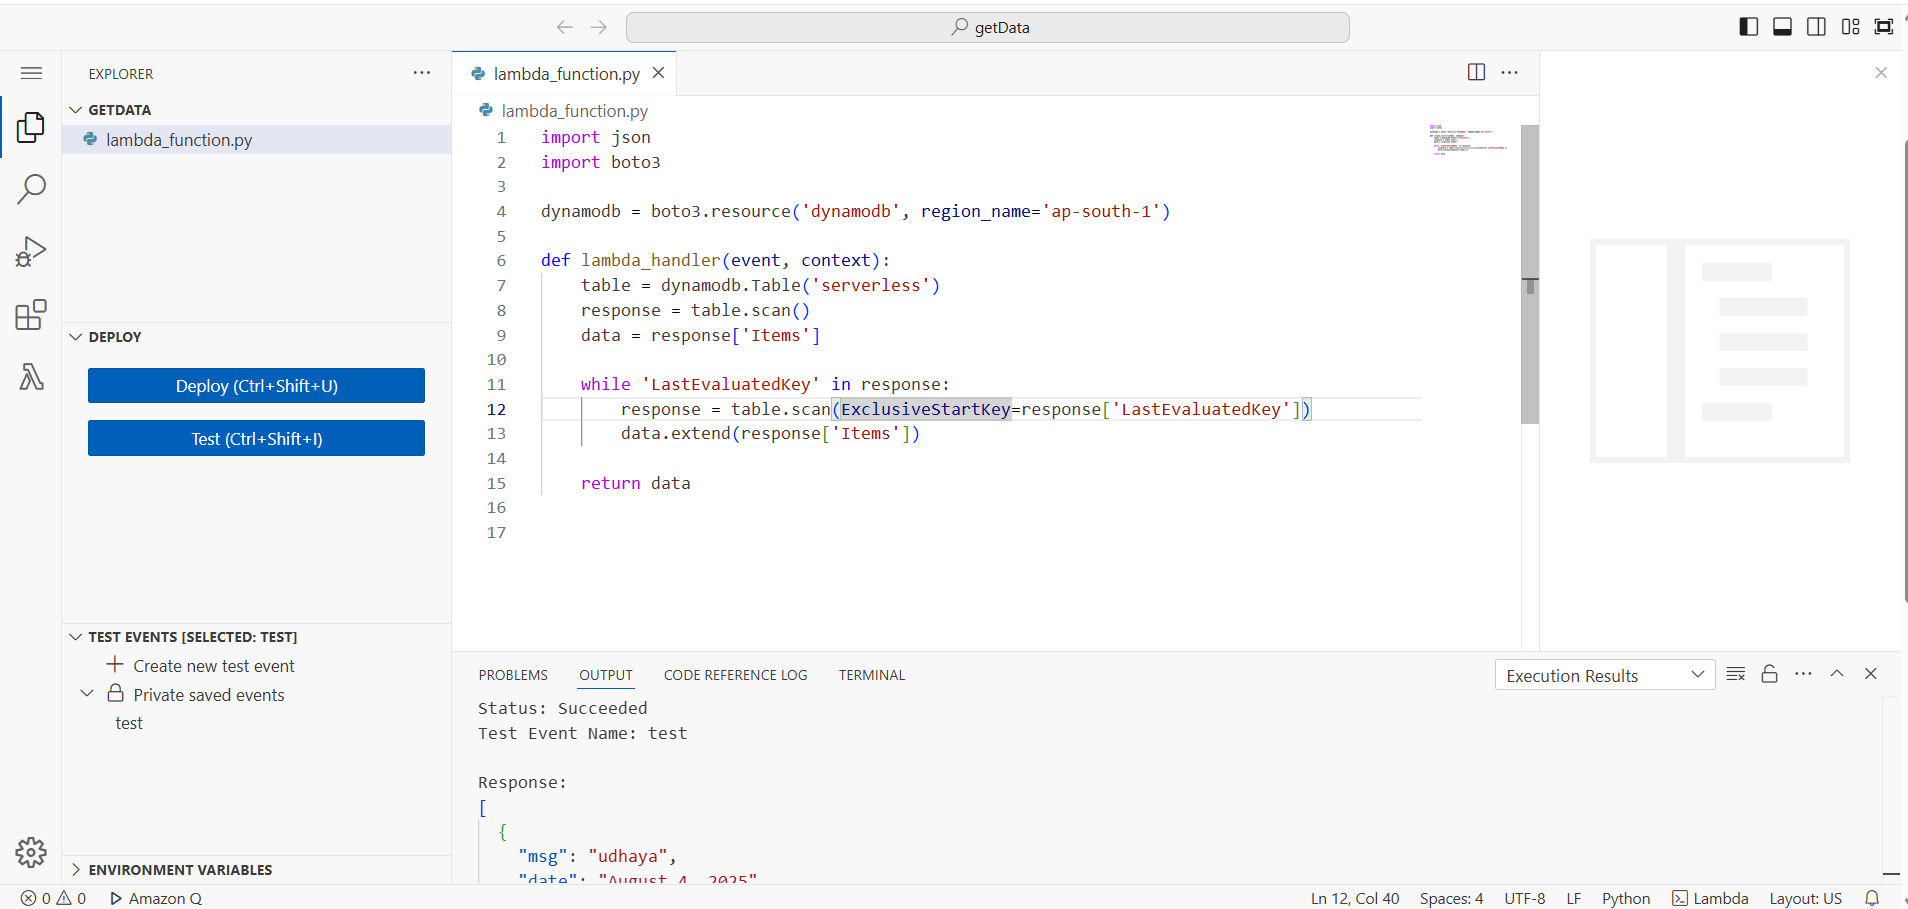 POST Lambda IMAGE
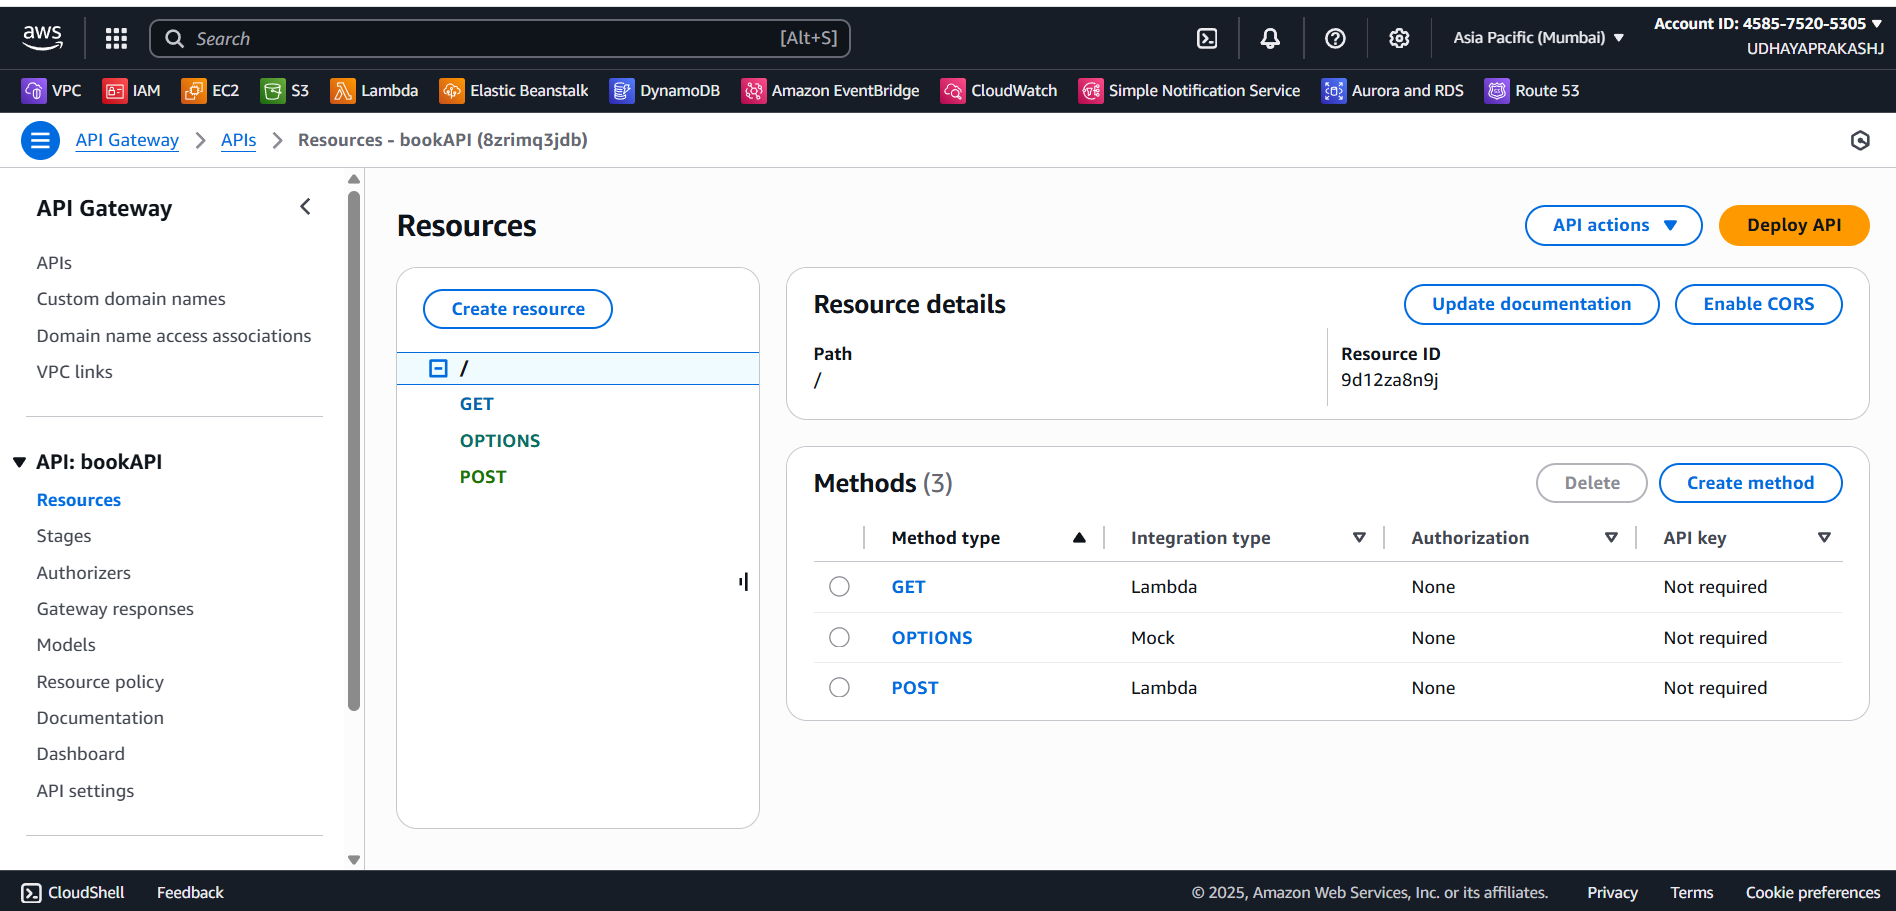
Step 4: Set Up API Gateway
- Log in to AWS Console & open API Gateway.
- Create a new REST API.
- Create an HTTP API in API Gateway.
- Create two routes:POST /contacts → POST Lambda.
- GET /contacts → GET Lambda.
- Enable CORS for your frontend origin (or * for testing), deploy the API, and copy the invoke URL(s)and past it in JavaScript api url point.
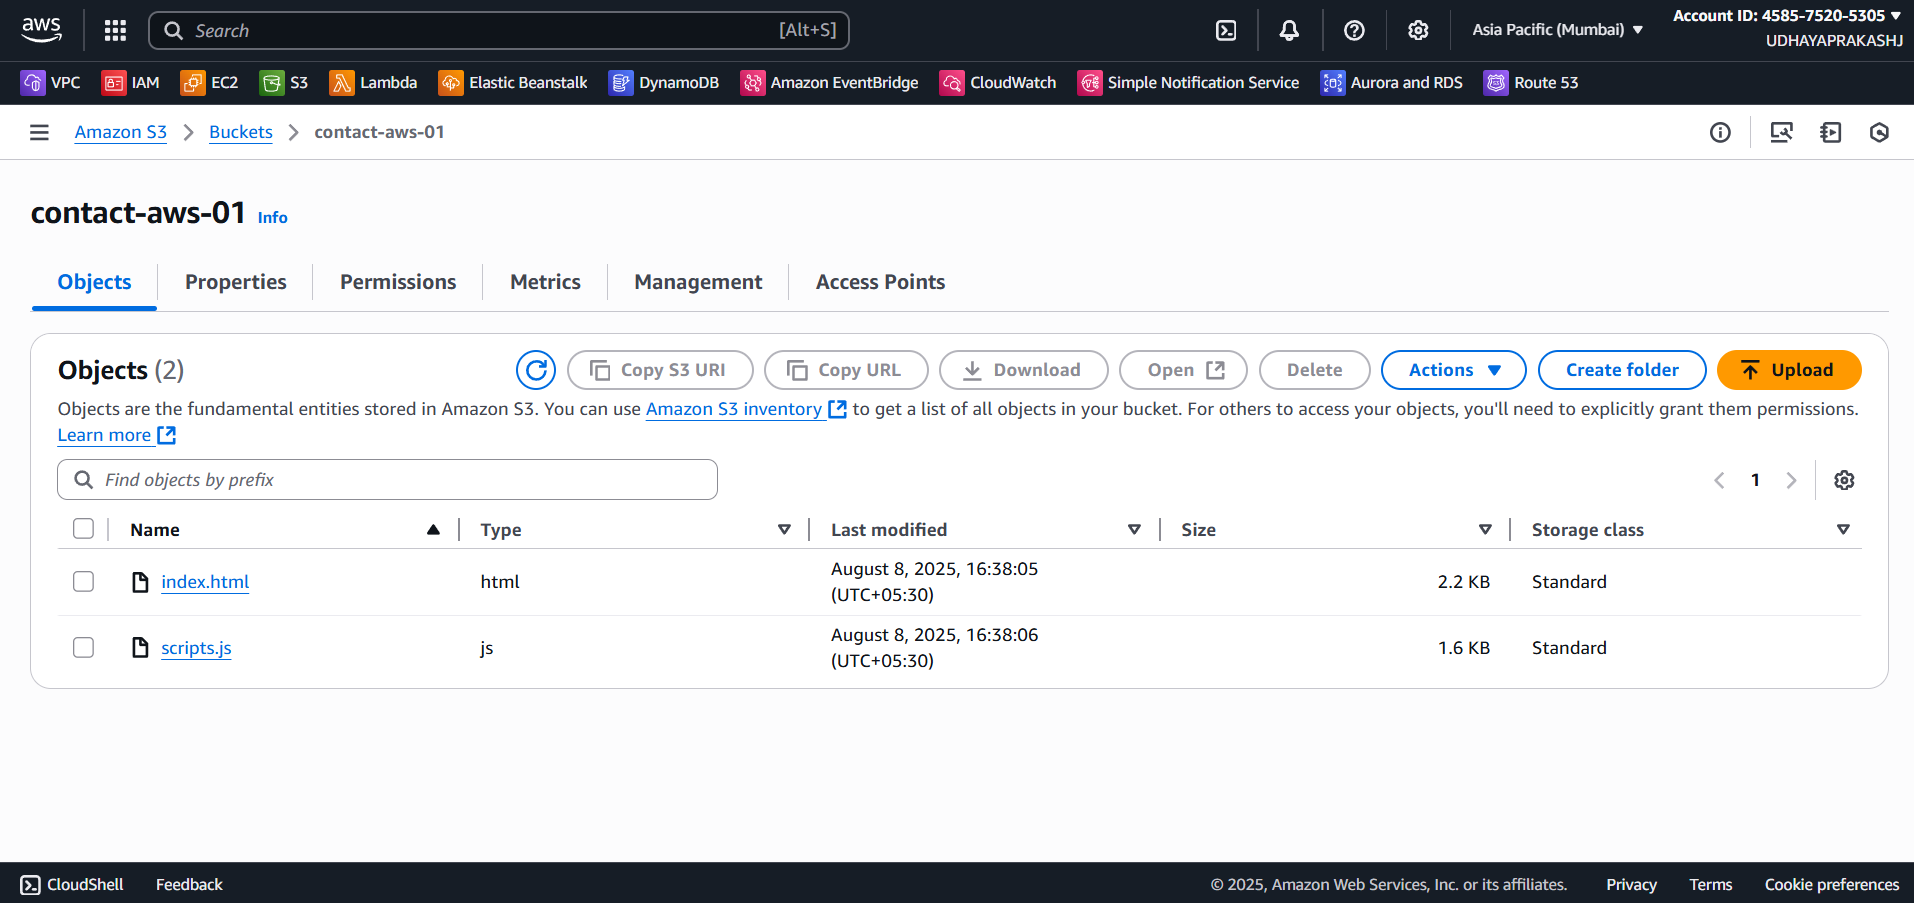
Step 5: Deploy Frontend to S3
- Create an S3 bucket (globally unique name).
- Enable static website hosting in the bucket properties.
- Configure caching, HTTPS, and (optionally) an origin access identity.
- Use the CloudFront domain name as the public URL for the app (or map a custom domain).
Step 6: Deploy Frontend to S3 + CloudFront
- Create a CloudFront distribution using the S3 website or S3 origin.
- Set Default Root Object to index.html.
- Enable static website hosting.
- Create a CloudFront distribution pointing to the S3 bucket.
- Use CloudFront URL as your project domain.
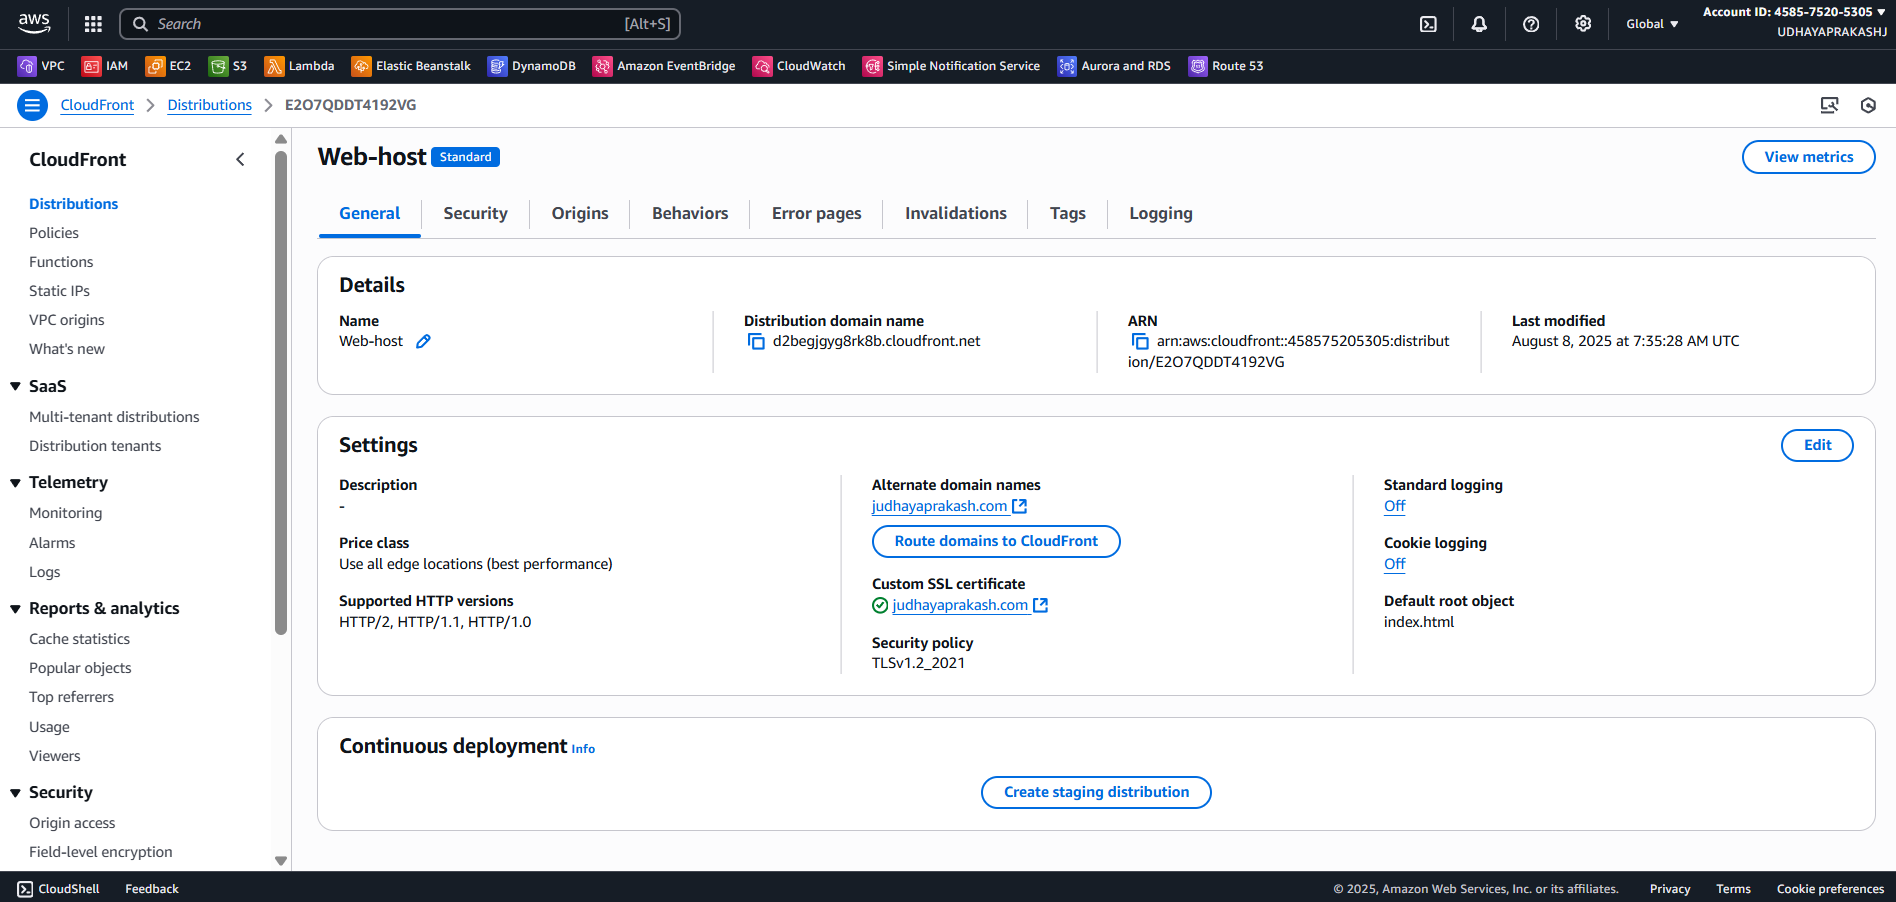
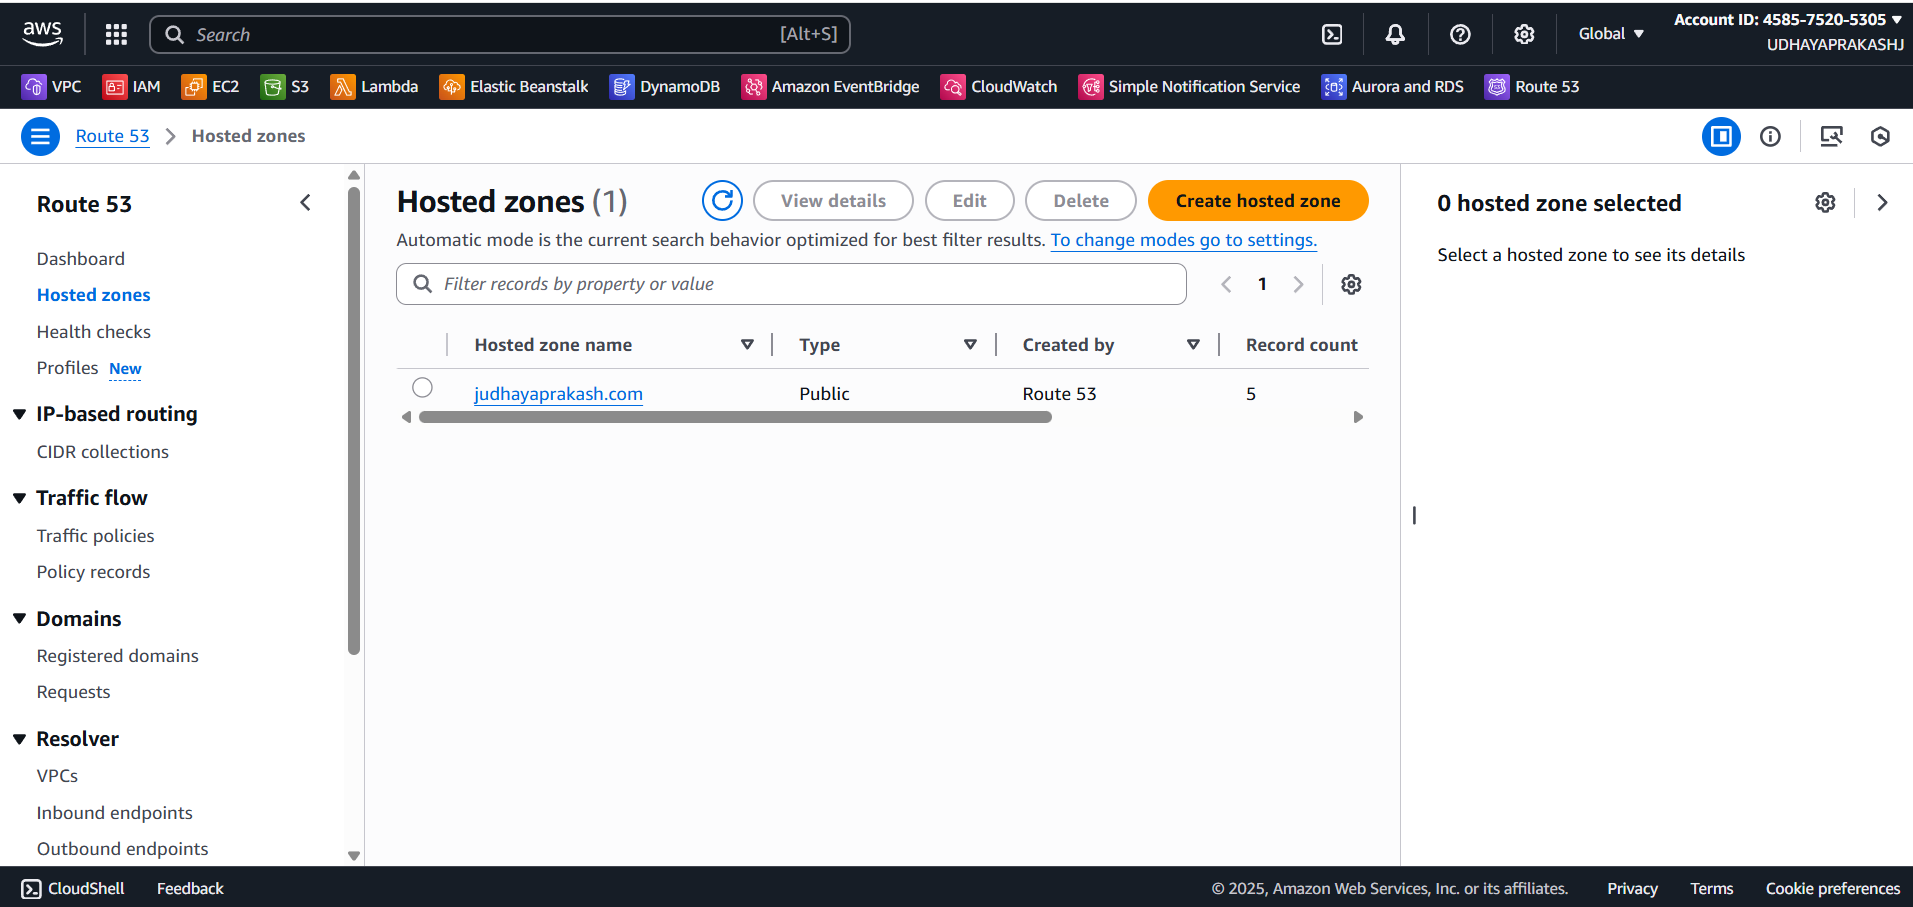
Step 7: (Optional) Configure a Custom Domain with Route 53
- Register or use an existing domain in Route 53.
- Create an Alias record pointing to the CloudFront distribution.
- Request/attach an ACM certificate (us-east-1 for CloudFront) and enable HTTPS.
- Monitor DynamoDB usage for CloudWatch.